EasyList
We all have things to do but sometimes all of these tasks can feel a little bit overwhelming and hard to keep track of.
Normally, I use my awesome whiteboard to organize myself and see all my tasks at a glance.

Simple Whiteboard
A massive canvas for brainstorming. Boosts Creativity.
However, carrying around a huge whiteboard is a bit tough. 😅
So, I wanted to build a simple task manager app that I can access anytime from my laptop. Let's go!
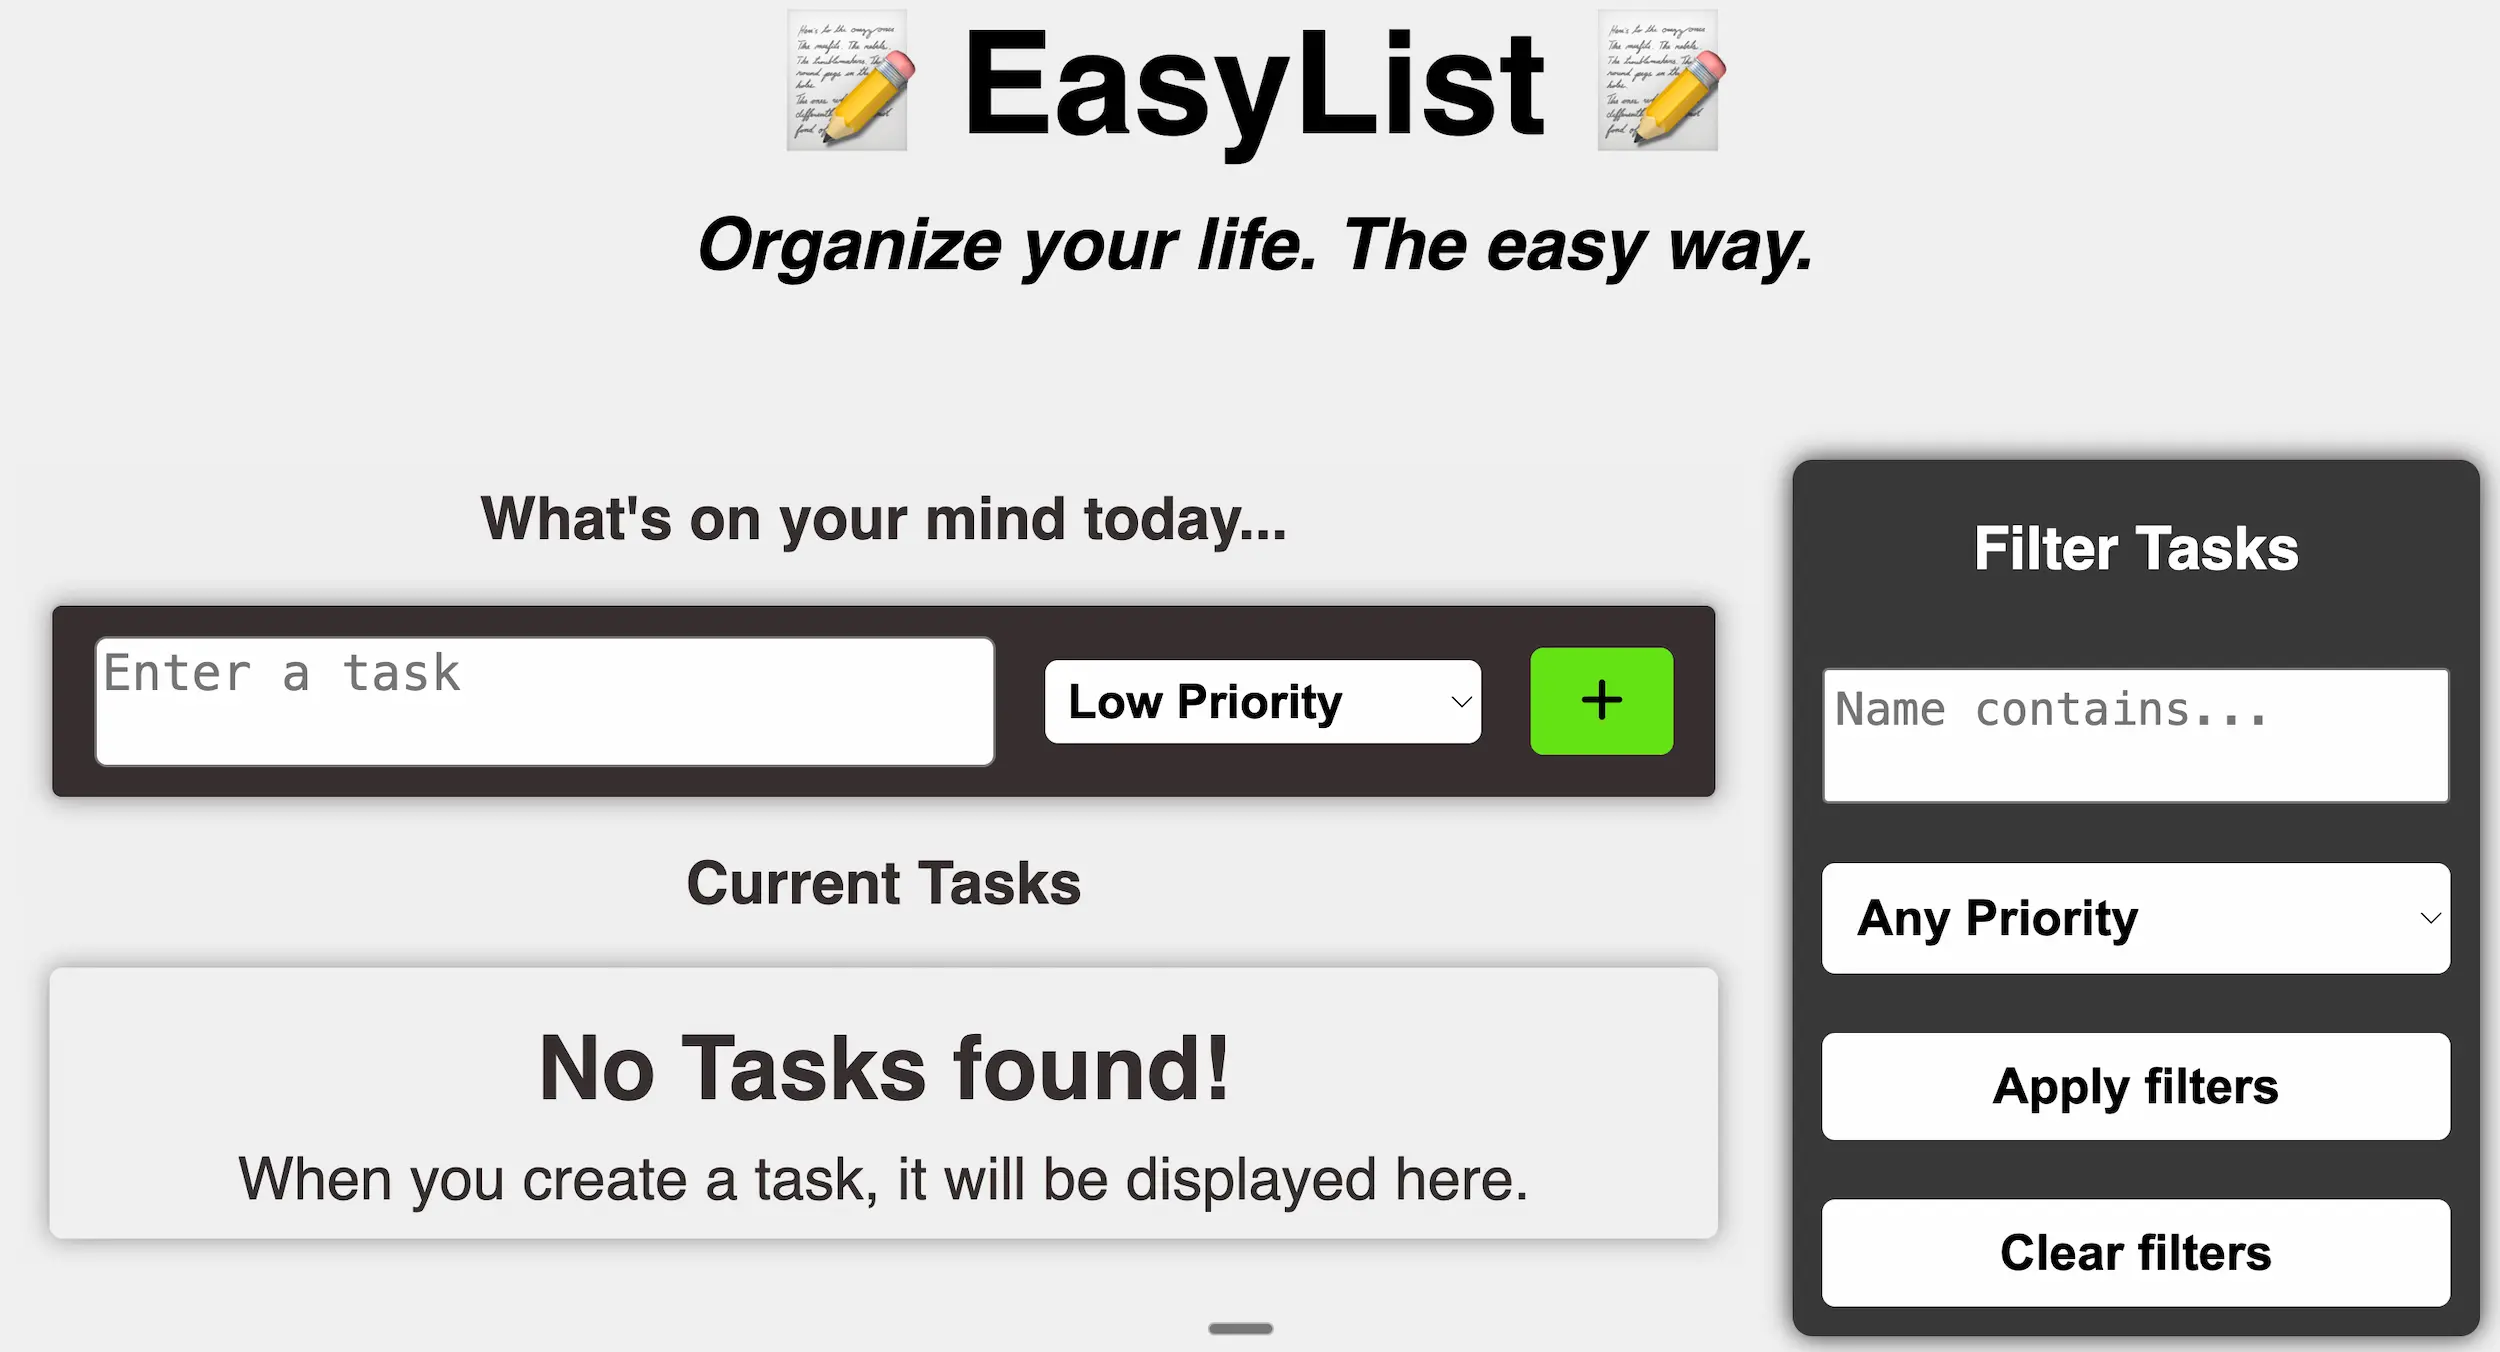
Organize your life. The easy way.
EasyList is a lightweight, zero-dependency task manager built entirely in Vanilla JavaScript. I built this project to understand the fundamentals of DOM manipulation and state management before moving on to frameworks like React.
- No React.
- No Build Steps.
- Just Code.
You can try it here: Easy List
⚡ Features
- 💾 Persistent Memory: Uses localStorage so your tasks survive a browser refresh.
- 🚨 Priority System: Tag tasks as Low, Medium, or High priority to sort your day.
- 🔍 Smart Filtering: Search by keyword OR filter by priority level in real-time.
- ✏️ Quick Actions: Edit task details or change priorities on the fly without page reloads.
🧠 How it Works
The app follows a "Single Source of Truth" architecture, similar to how modern frameworks work, but built manually.
- The State: A master taskList array holds all data objects.
- The Render: The updateUI() function wipes and rebuilds the DOM based on the current state. This ensures the UI is always in sync with the data.
- The Filter: Instead of modifying the array, we toggle a display: boolean property on each task to hide/show them based on search criteria.
💻 Code Snippet: The Render Loop
Here is the logic that replaces React's Virtual DOM diffing. It manually constructs the HTML string based on the state array.
function updateUI() {
  let newInnerHTML = "";
  if (taskList.length === 0) {
    newInnerHTML = `<div class="no-task">
            <h3>No Tasks found!</h3>
            <p>When you create a task, it will be displayed here.</p>
        </div>`;
  } else {
    taskList.forEach((task, index) => {
      if (task.display === true) {
        newInnerHTML += `<div class="task">
                <p>${task.name}</p>
                <select onchange="quickEdit(${index})">
                    <option value="Low" ${task.priority === "Low" ? "selected" : ""}>Low</option>
                    <option value="Medium" ${task.priority === "Medium" ? "selected" : ""}>Medium</option>
                    <option value="High" ${task.priority === "High" ? "selected" : ""}>High</option>
                </select>
                <button class="btn-edit-task" onclick="editTask(${index})"><i class="fa-solid fa-pen"></i></button>
                <button class="btn-delete-task" onclick="deleteTask(${index})"><i class="fa-solid fa-xmark"></i></button>
            </div>`;
      }
    });
  }
  taskContainer.innerHTML = newInnerHTML;
  localStorage.setItem("taskList", JSON.stringify(taskList));
}
Building this little web app helped me understand the basics of DOM manipulation while building something useful for myself.
